2023. 4. 25. 14:03ㆍDL/DL_Basic
Pytorch
파이썬에서 제공되는 딥러닝 네트워크
tensorflow와 같이 많은 사람들이 사용하는 딥러닝 프레임워크
Numpy vs Pytorch
- 딥러닝에서 numpy만을 사용한다면, backpropagation에서 모든 미분식을 직접 계산하고 코드로 작성해야함. 반면 Pytorch 사용시 backward() 함수 호출 시 자동으로 계산
- GPU틑 통한 연산 가능 여부
- Numpy의 경우 GPU로 값들을 보내 연산을 돌리고 다시 받는 것이 불가능
- Pytorch의 경우 내부적으로 CUDA를 통해 GPU 사용가능 -> 연산빠름
* CUDA - 엔비디아가 개발한 GPU를 통한 연산을 가능하게 만든 API 모델
Tensorflow vs Pytorch
공통점
- 둘 다 연산에 GPU이용하는 프레임 워크
차이점
- tensorflow 의 경우 연산 그래프를 먼저 만들고 실제 연산시 값을 전달하여 결과 얻는 'Define and Run' 방식
- pytorch의 경우 연산 그래프를 정의하는 것과 동시에 값도 초기화되어 연산 이뤄지는 'Define by Run' 방식
- 연산 속도에서 차이 - pytorch가 빠르다
Tensor in Pytorch
|
1
2
3
4
5
6
|
tensor = torch.rand(3,4)
print(f"Shape of tensor: {tensor.shape}")
print(f"Datatype of tensor: {tensor.dtype}")
# 이 텐서가 메모리에 올라가 있냐, 어느 메모리에 올라가있냐, cpu or gpu?
print(f"Device tensor is stored on: {tensor.device}")
|
cs |
Shape of tensor: torch.Size([3, 4])
Datatype of tensor: torch.float32
Device tensor is stored on: cpu
* tensorflow와 달리 pytorch 사용하려면 어떤 device를 쓰는지 지정해줘야한다 *
|
1
2
3
4
5
6
7
8
9
10
|
# 속성 변경
tensor = tensor.reshape(4,3)
tensor = tensor.int()
# device바꿀때
if torch.cuda.is_available():
tensor = tensor.to('cuda')
print(f"Shape of tensor: {tensor.shape}")
print(f"Datatype of tensor: {tensor.dtype}")
print(f"Device tensor is stored on: {tensor.device}")
|
cs |
Shape of tensor: torch.Size([4, 3])
Datatype of tensor: torch.int32
Device tensor is stored on: cpu
* 내 노트북에선 GPU 사용불가라 결과가 CPU로 나옴
reshape, view, permute
공통점 - 모두 tensor의 형태를 바꾼다.
reshape, view vs permute
- reshape, view에서는 넣을 엔트리들이 전체 텐서의 수(사이즈)가 같아야함
- permute에서는 () 안에 들어가는 수가 index를 의미
|
1
2
3
4
5
6
7
8
9
10
|
a = torch.arange(16).reshape(2,2,4)
print(a, a.shape)
b = a.transpose(1, 2)
print(b, b.shape)
c = a.permute((2, 0, 1))
print(c, c.shape)
|
cs |
tensor([[[ 0, 1, 2, 3],
[ 4, 5, 6, 7]],
[[ 8, 9, 10, 11],
[12, 13, 14, 15]]]) torch.Size([2, 2, 4])
tensor([[[ 0, 4],
[ 1, 5],
[ 2, 6],
[ 3, 7]],
[[ 8, 12],
[ 9, 13],
[10, 14],
[11, 15]]]) torch.Size([2, 4, 2])
tensor([[[ 0, 4],
[ 8, 12]],
[[ 1, 5],
[ 9, 13]],
[[ 2, 6],
[10, 14]],
[[ 3, 7],
[11, 15]]]) torch.Size([4, 2, 2])
in_place 연산
새로운 변수에 저장하는 것이 아닌 기존의 변수에 덮어쓰는 방법
in-place 방식으로 tensor의 값을 변경하는 연산 뒤에는 "_"가 붙는다.
|
1
2
3
4
5
6
7
|
# in-place 연산
print(x.add(y))
print(x)
#in-place연산으로 x에 값이 저장(덮어 씌워진다)
print(x.add_(y))
print(x)
|
cs |
tensor([[ 6., 8.],
[10., 12.]])
tensor([[1., 2.],
[3., 4.]])
tensor([[ 6., 8.],
[10., 12.]])
tensor([[ 6., 8.],
[10., 12.]])
Dataset / Dataloader
Pytorch에서 Data를 처리하여 model에 공급하는 방법
Dataset
- 전체 Dataset구성하는 단계
- Dataset의 feature를 가져오고 하나의 sample에 label지정하는 일을 한번에 처리
- input → 전체 x (input feature)와 y(label)을 tensor로 넣어줌
- data와 label을 저장
Dataset의 구성
- __init__(self) :
- dataset객체가 생생될때 한번만 실행,
- 필요한 변수들을 선언,
- 전체 x_data와 y_data load / 파일 목록 load
- __len__(self) :
- dataset의 sample개수 반환
- __getitem__(self,index) :
- index번째 data를 return (주어진 idx에 해당하는 sample을 불러오고 반환)
Dataloader
- sample들을 minibatch로 전달
- 순회 가능한 객체 (iterable)
- 배치 학습에 요긴하게 사용되는 클래스
- 모든 데이터를 한번에 모델에 입력하기 힘듬 -> 학습할 데이터셋을 쪼개, 미니 배치단위로 모델에 입력 => dataloader가 도와줌 ( mini batch만들어주는 역할)
Custom Dataset
- 많은 양의 data를 한번에 불러오려면 시간이 오래걸리는 것을 넘어서 RAM이 터지는 일이 발생
- data를 한번에 다 부르지 않고 하나씩만 불러서 쓰는 방식 -> custom dataset
- dataset내에서 data를 다양하게 조합하고 싶을때 사용
* Dataset을 상속받아 3개의 메소드(__init__, __getitem__, __len__)을 overriding해 작성
FashionMNIST
data 불러오기
|
1
2
3
4
5
6
7
8
9
10
11
12
13
14
15
16
|
from torch.utils.data import Dataset, DataLoader
import torchvision.transforms as tr
training_data = datasets.FashionMNIST(
root="data", # 저장할 디렉토리 이름, 데이터가 저장되는 경로
train=True, # True -> training set 받아오기, training set 여부 지
download=True, # root에 data가 없는 경우 인터넷에서 다운로드
transform=ToTensor() # ToTensor() - 데이터를 tensor로 바꿔준다, 0~1 사이 값
)
test_data = datasets.FashionMNIST(
root="data",
train=False, #False -> test set 받아오기
download=True,
transform=ToTensor()
)
|
cs |
DataLoader 만들기
|
1
2
3
4
5
6
7
8
9
10
11
12
13
14
15
|
# DataLoader 만들기
train_dataloader = DataLoader(training_data, batch_size=64, shuffle=True)
test_dataloader = DataLoader(test_data, batch_size=64, shuffle=False)
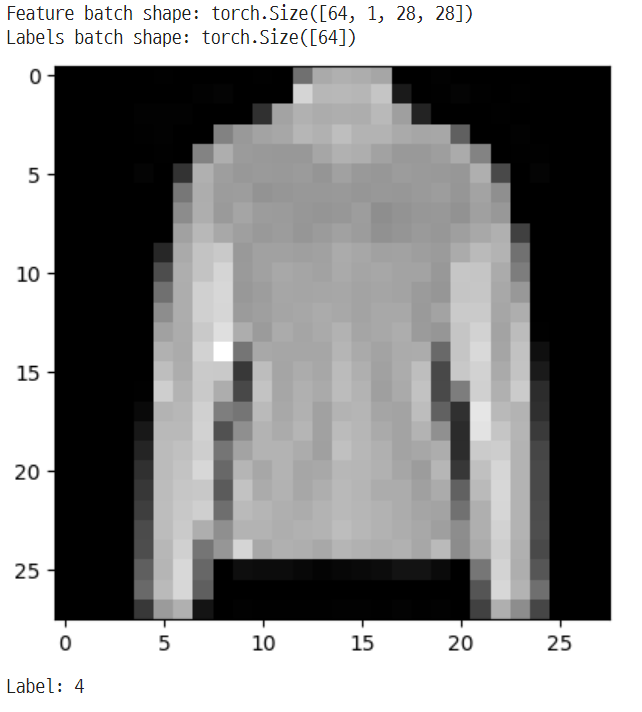
# DataLoader를 통해 반복하기(iterate)
# 이미지와 정답(label)을 표시합니다.
train_features, train_labels = next(iter(train_dataloader))
print(f"Feature batch shape: {train_features.size()}") #shape과 동일
print(f"Labels batch shape: {train_labels.size()}")
img = train_features[0].squeeze()
label = train_labels[0]
plt.imshow(img, cmap="gray")
plt.show()
print(f"Label: {label}")
|
cs |
Custom Dataset, DataLoader 만들기
|
1
2
3
4
5
6
7
8
9
10
11
12
13
14
15
16
17
18
19
20
21
22
23
24
25
26
27
28
29
|
# 간단한 Custom Dataset/Transform/DataLoader 만들기
class CustomDataset(Dataset):
def __init__(self, np_data, transform=None):
self.data = np_data
self.transform = transform
self.len = np_data.shape[0]
def __len__(self):
return self.len
def __getitem__(self, idx):
sample = self.data[idx]
if self.transform:
sample = self.transform(sample)
return sample
def square(sample):
return sample**2
trans = tr.Compose([square])
np_data = np.arange(10)
custom_dataset = CustomDataset(np_data, transform=trans)
custom_dataloader = DataLoader(custom_dataset, batch_size=2, shuffle=True)
for _ in range(3):
for data in custom_dataloader:
print(data)
print("="*20)
|
cs |
tensor([ 9, 81])
tensor([ 0, 25])
tensor([64, 16])
tensor([ 1, 36])
tensor([49, 4])
====================
tensor([64, 81])
tensor([4, 9])
tensor([36, 1])
tensor([49, 16])
tensor([ 0, 25])
====================
tensor([16, 36])
tensor([ 9, 64])
tensor([81, 0])
tensor([ 1, 49])
tensor([ 4, 25])
====================
Model
Tensorflow에선 Squential, Functional, Model Class Subclassing으로 model을 만들 수 있다.
Pytorch에서는 Model Class를 이용한 방법을 권장
↓ FashionMNIST dataset의 image들을 분류하는 신경망 구성
|
1
2
3
4
5
6
7
8
|
import os
import torch
from torch import nn
from torch.utils.data import DataLoader
from torchvision import datasets, transforms
device = "cuda" if torch.cuda.is_available() else "cpu"
print(f"Using {device} device")
|
cs |
Using cpu device
* 가능한 경우 GPU사용하려고 함, torch.cuda사용할 수 있는지 확인
Model class만들기
|
1
2
3
4
5
6
7
8
9
10
11
12
13
14
15
16
17
18
19
|
class NeuralNetwork(nn.Module):
def __init__(self):
super(NeuralNetwork, self).__init__()
self.flatten = nn.Flatten()
self.linear_relu_stack = nn.Sequential(
nn.Linear(28*28, 128),
nn.ReLU(),
nn.Dropout(0.2),
nn.Linear(128, 10)
)
def forward(self, x): # tensorflow는 call
x = self.flatten(x)
logits = self.linear_relu_stack(x)
return logits
# Model instance 생성, device 설정
model = NeuralNetwork().to(device)
print(model) # tensorflow => model.summary(), 레이어 구성 볼 수 있음
|
cs |
NeuralNetwork(
(flatten): Flatten(start_dim=1, end_dim=-1)
(linear_relu_stack): Sequential(
(0): Linear(in_features=784, out_features=128, bias=True)
(1): ReLU()
(2): Dropout(p=0.2, inplace=False)
(3): Linear(in_features=128, out_features=10, bias=True)
)
)
Model 저장하고 불러오기
Parameter만 저장하고 불러오기
|
1
2
3
4
5
6
7
8
9
10
11
12
13
14
15
16
17
18
19
20
21
|
# 학습된 model parameter 저장
# state_dict -> 모델로 학습 시 각 layer마다 텐서로 매핑되는 매개변수를 python dictionary타입으로 저장한 객체
# 모델의 구조에 맞게 각 레이어마다의 매개변수를 텐서형태로 매핑, dictionary형태로 저장장
torch.save(model.state_dict(), 'model_weights.pth')
# 새 Model instance 생성, device 설정
model2 = NeuralNetwork().to(device)
print(model2)
# test
# eval() -> nn.Module에서 train time과 eval time에서 수행하는 다른 작업을 수행할 수 있도록 switchin하는 함수
# evaluation과정에서 사용하지 않아야 하는 layer들을 알아서 off시켜주는 함수인 셈
model2.eval()
test_loop(test_dataloader, model2, loss_fn)
# 저장한 parameter 불러오기
model2.load_state_dict(torch.load('model_weights.pth'))
# test
model2.eval()
test_loop(test_dataloader, model2, loss_fn)
|
cs |
NeuralNetwork(
  (flatten): Flatten(start_dim=1, end_dim=-1)
  (linear_relu_stack): Sequential(
    (0): Linear(in_features=784, out_features=128, bias=True)
    (1): ReLU()
    (2): Dropout(p=0.2, inplace=False)
    (3): Linear(in_features=128, out_features=10, bias=True)
  )
)

Test Error:
 Accuracy: 11.3%, Avg loss: 2.308770

<All keys matched successfully>

Test Error:
 Accuracy: 88.3%, Avg loss: 0.334079
Model 전체를 저장하고 불러오기
|
1
2
3
4
5
6
7
8
9
|
# 저장하기
torch.save(model, 'model.pth')
# 불러오기
model3 = torch.load('model.pth')
# test
model3.eval()
test_loop(test_dataloader, model2, loss_fn)
|
cs |
Test Error:
 Accuracy: 88.3%, Avg loss: 0.334079
* 제 깃허브에 있는 Pytorch_Tutorial.ipynb에서 모르는 부분만 따로 정리한 글입니다.
[PYTORCH]파이토치 사용하기
파이토치란 파이썬에서 제공되는 딥러닝 프레임워크다.출처 : 파이토치 첫걸음 - 최건호파이토치의 장점을 설명하기 위해 먼저 파이썬에서 많이 쓰이는 Numpy 라이브러리와 파이토치를 비교해보
velog.io
https://sanghyu.tistory.com/90
[PyTorch] Dataset과 Dataloader 설명 및 custom dataset & dataloader 만들기
Custom dataset/dataloader 가 필요한 이유 점점 많은 양의 data를 이용해서 딥러닝 모델을 학습시키는 일이 많아지면서 그 많은 양의 data를 한번에 불러오려면 시간이 오래걸리는 것을 넘어서서 RAM이 터
sanghyu.tistory.com
'DL > DL_Basic' 카테고리의 다른 글
| Tensorflow_Keras_Tutorial (0) | 2023.04.25 |
|---|